Install the Plugin
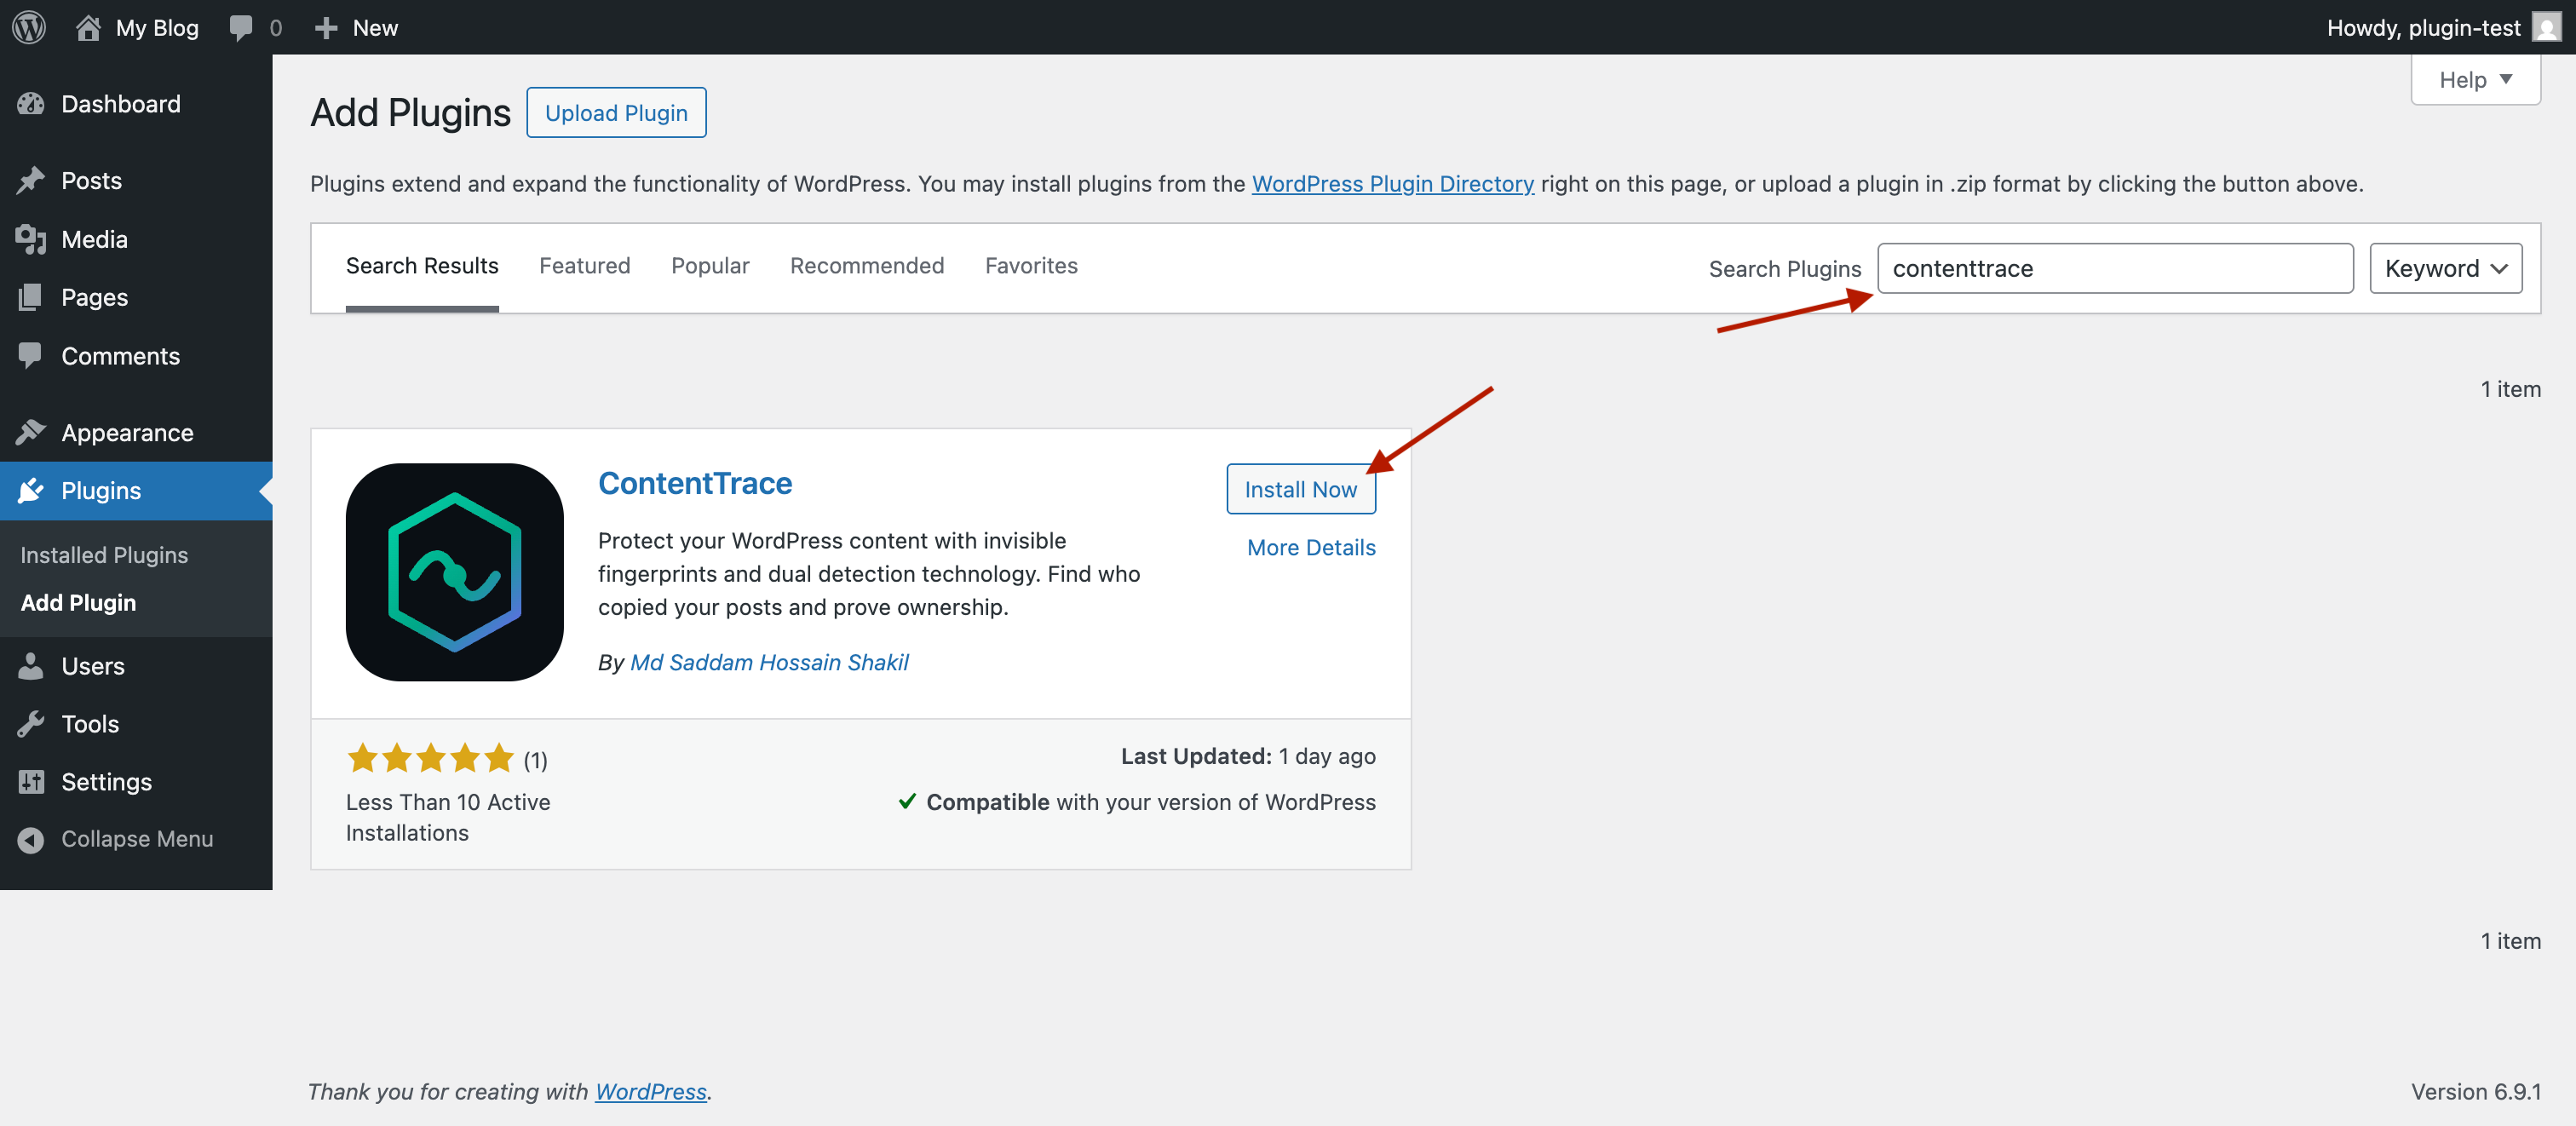
In your WordPress dashboard, go to Plugins → Add New. Search for "ContentTrace" and click Install Now, then Activate. That's it — your posts are now protected. No configuration needed.
Your Dashboard & Ownership Proof
Go to ContentTrace → Token Dashboard in your WordPress sidebar. You'll see all your posts at a glance — each one automatically gets a hidden token that helps with detection. From here you can search, export, and manage your protected content.
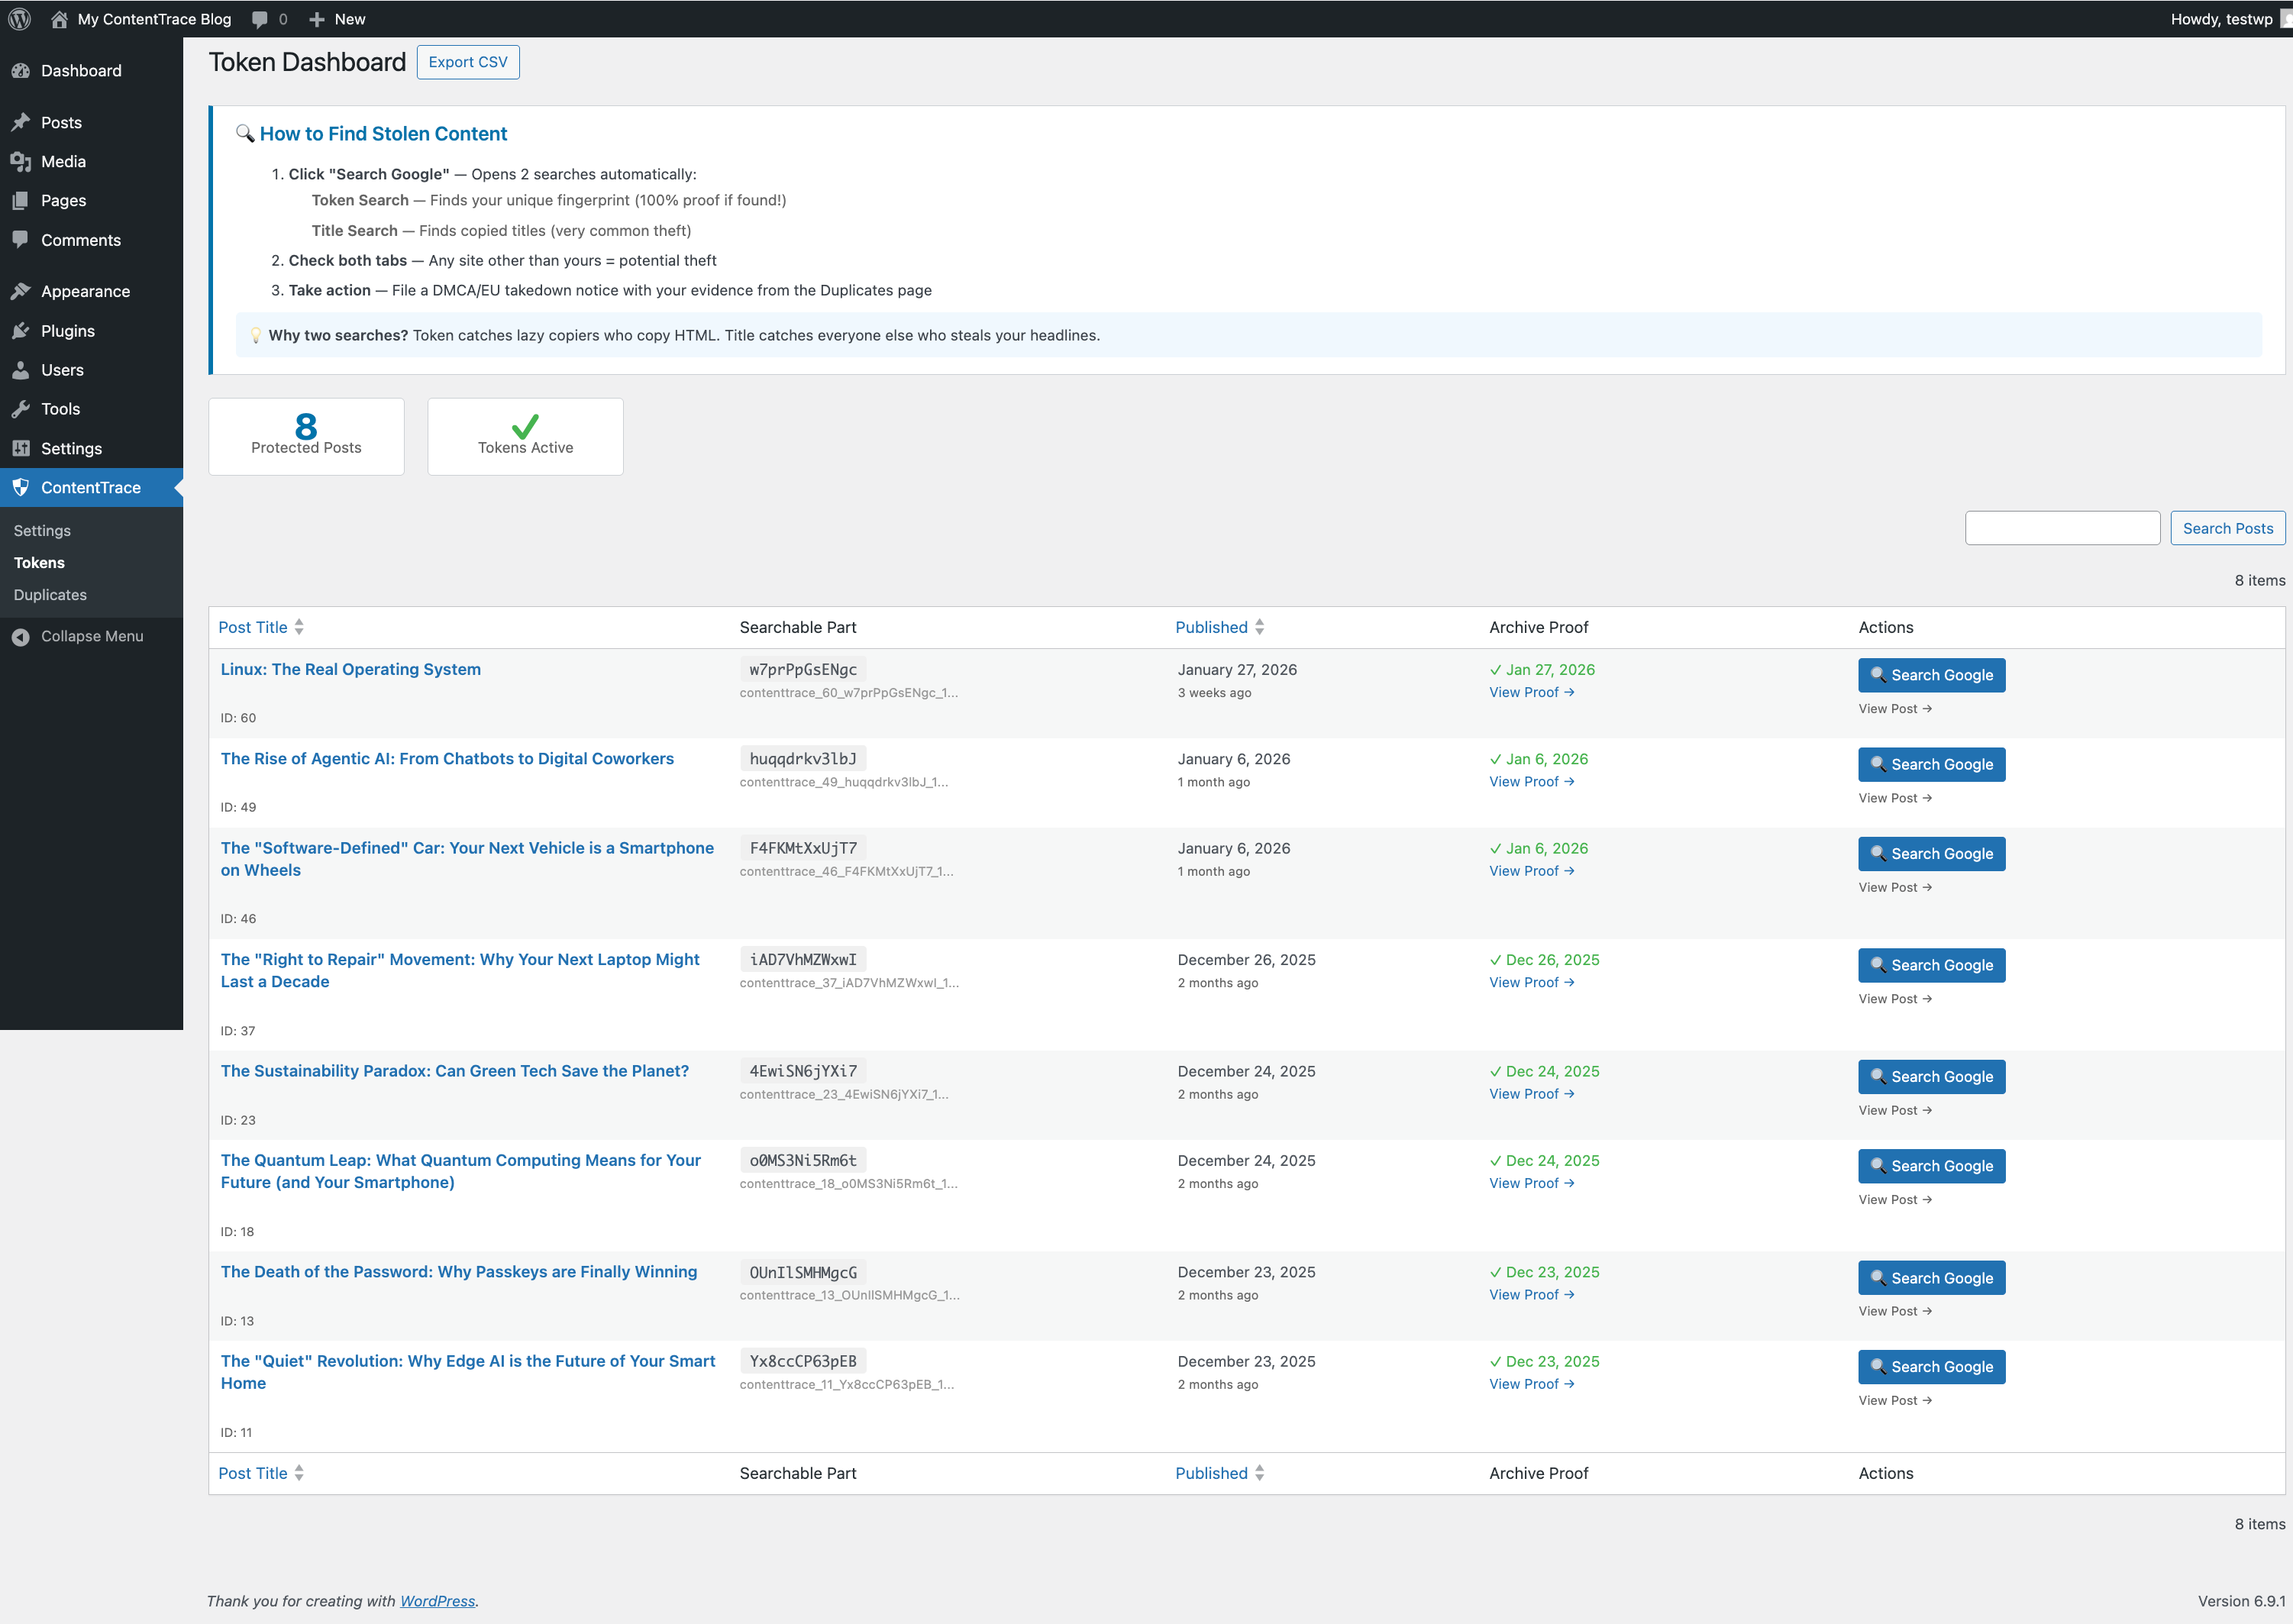
This is also where you save proof of ownership. Click the "Save to Archive.org" button next to any post to create a third-party timestamp — independent proof that you published first, stored on a neutral server you don't control.
- Free — click the button to save any post to Archive.org
- Pro & Pro+ — every post is automatically saved when published. No action needed.
Scan the Web for Stolen Content
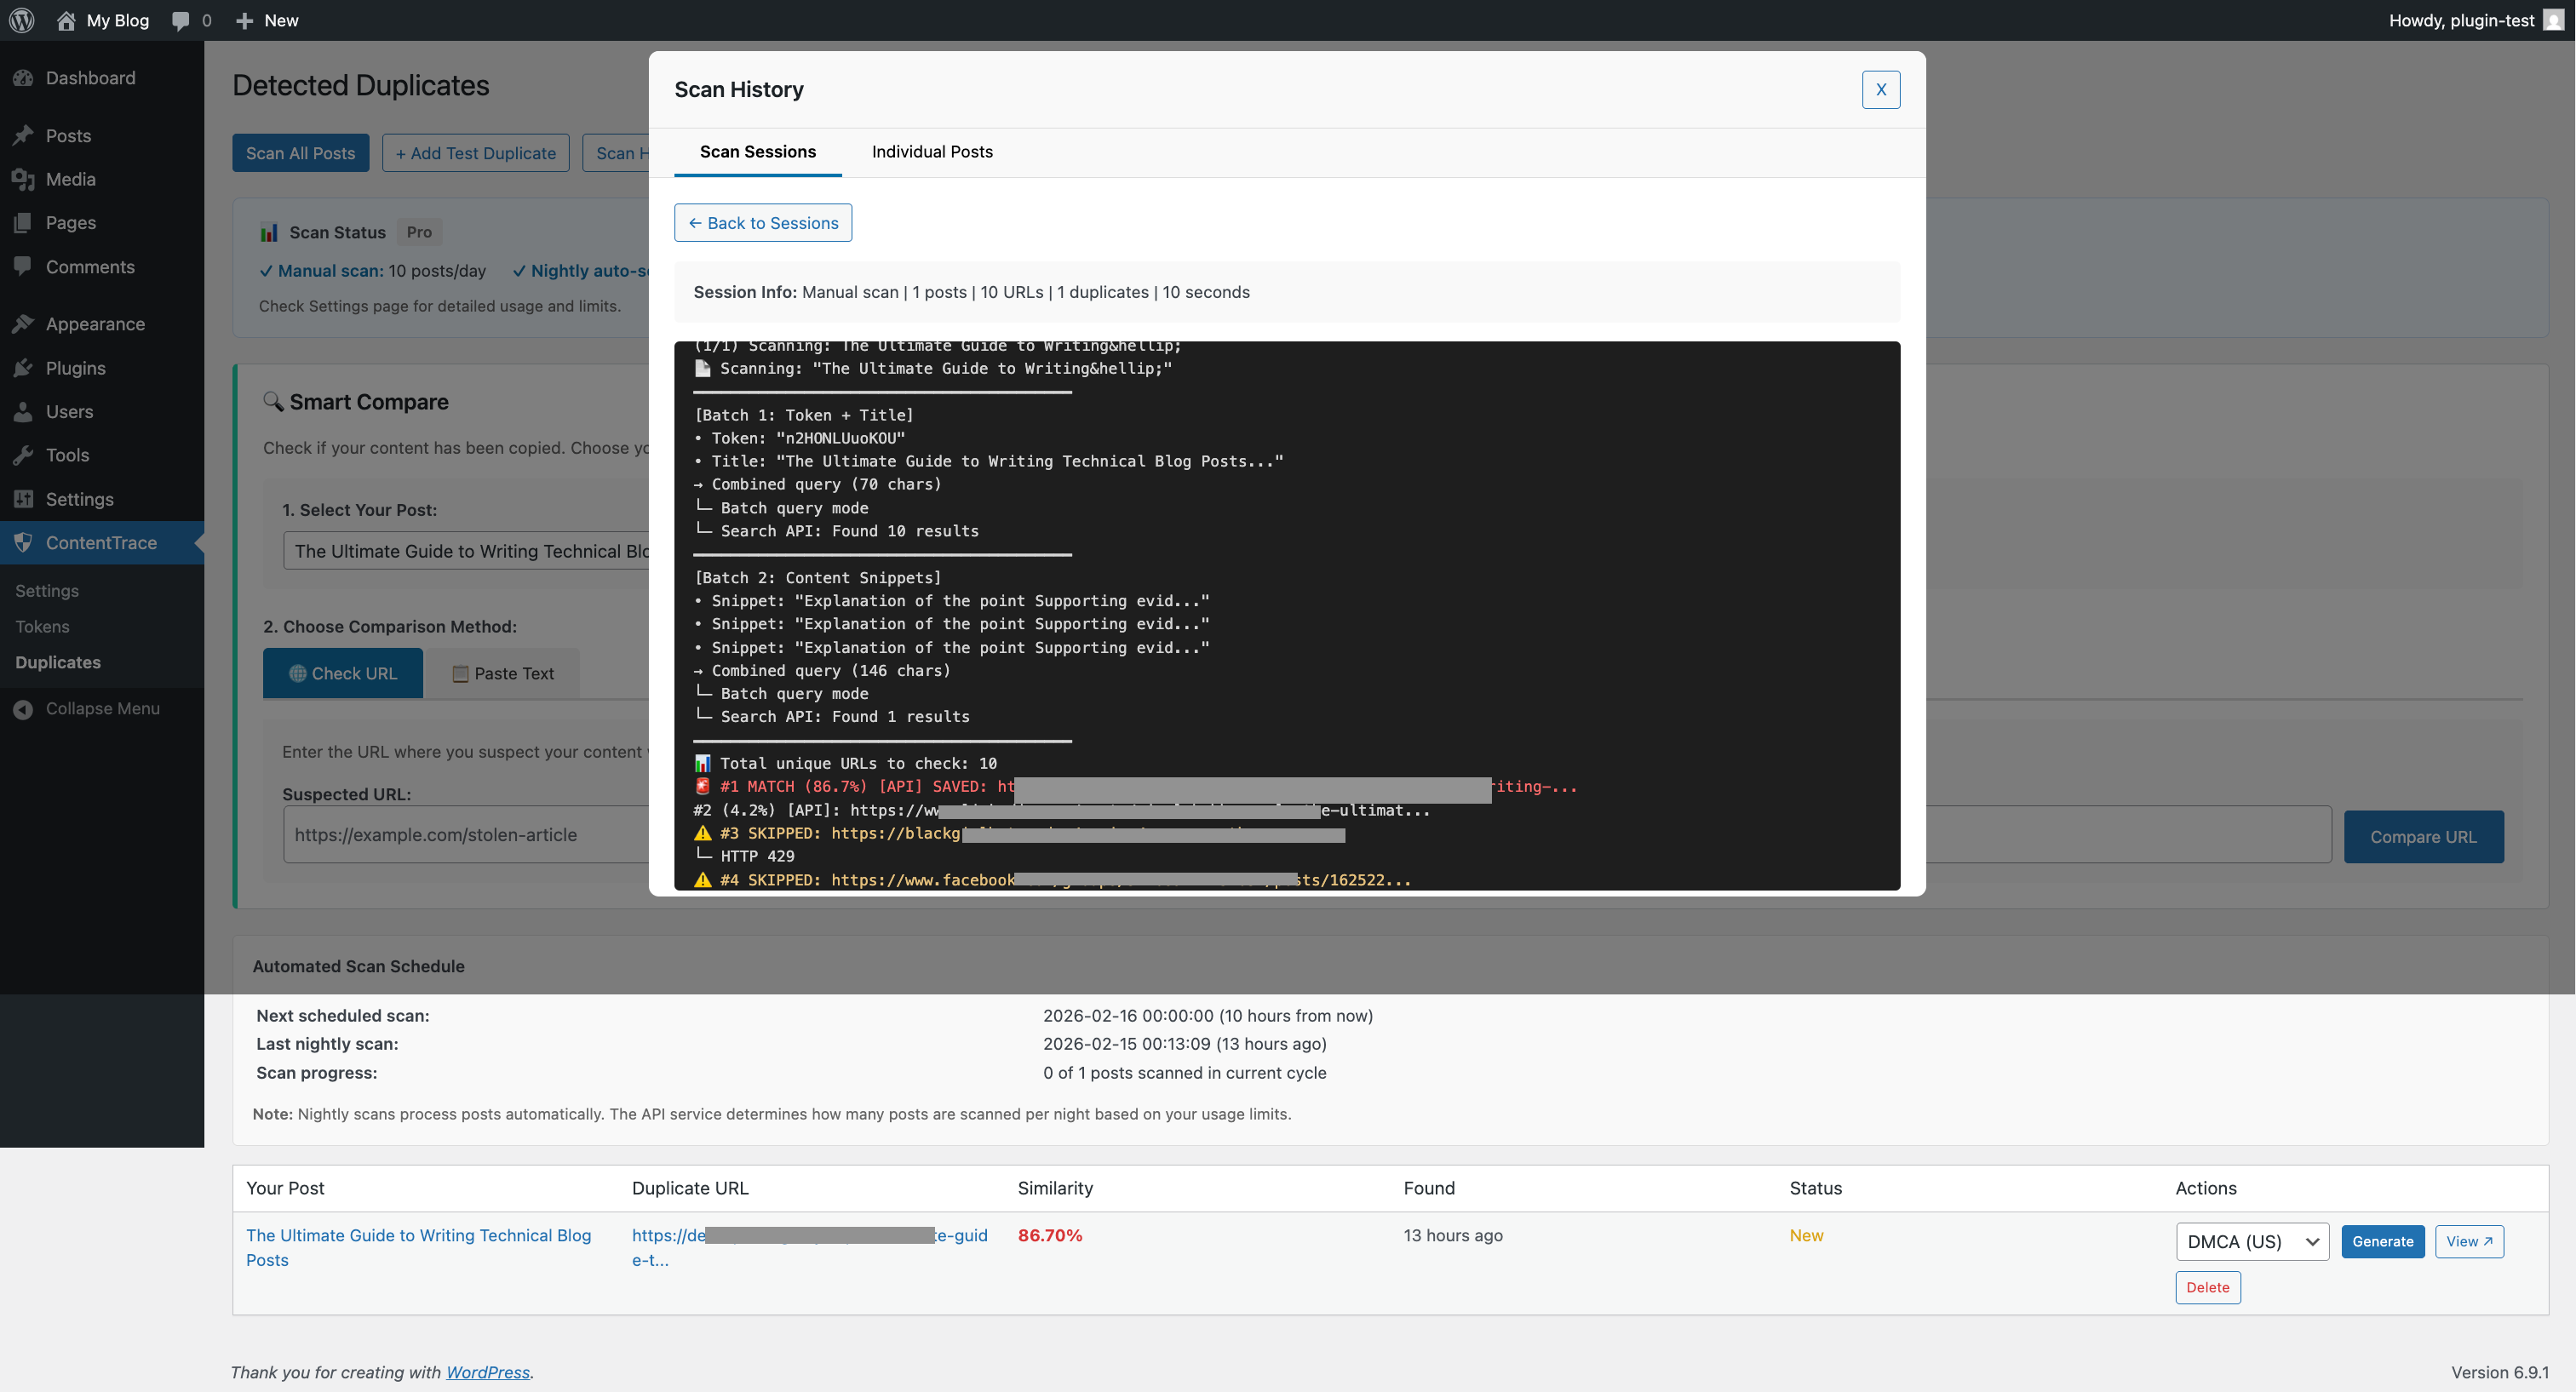
Go to ContentTrace → Duplicates and click "Scan All Posts". ContentTrace automatically searches the web for copies of your content using multiple detection methods:
- Key phrase & sentence pattern matching — extracts unique phrases and writing patterns from your posts, then searches the web for them. Catches copies even if the thief rewrote, paraphrased, or stripped your HTML.
- Invisible tokens — a hidden marker in each post that scrapers copy unknowingly, making detection instant.
Every potential match goes through a similarity analysis that scores how closely it matches your original (e.g., 72% match). You see the matched phrases side by side, so you can immediately tell real theft from a coincidence.
Compare Suspicious Content
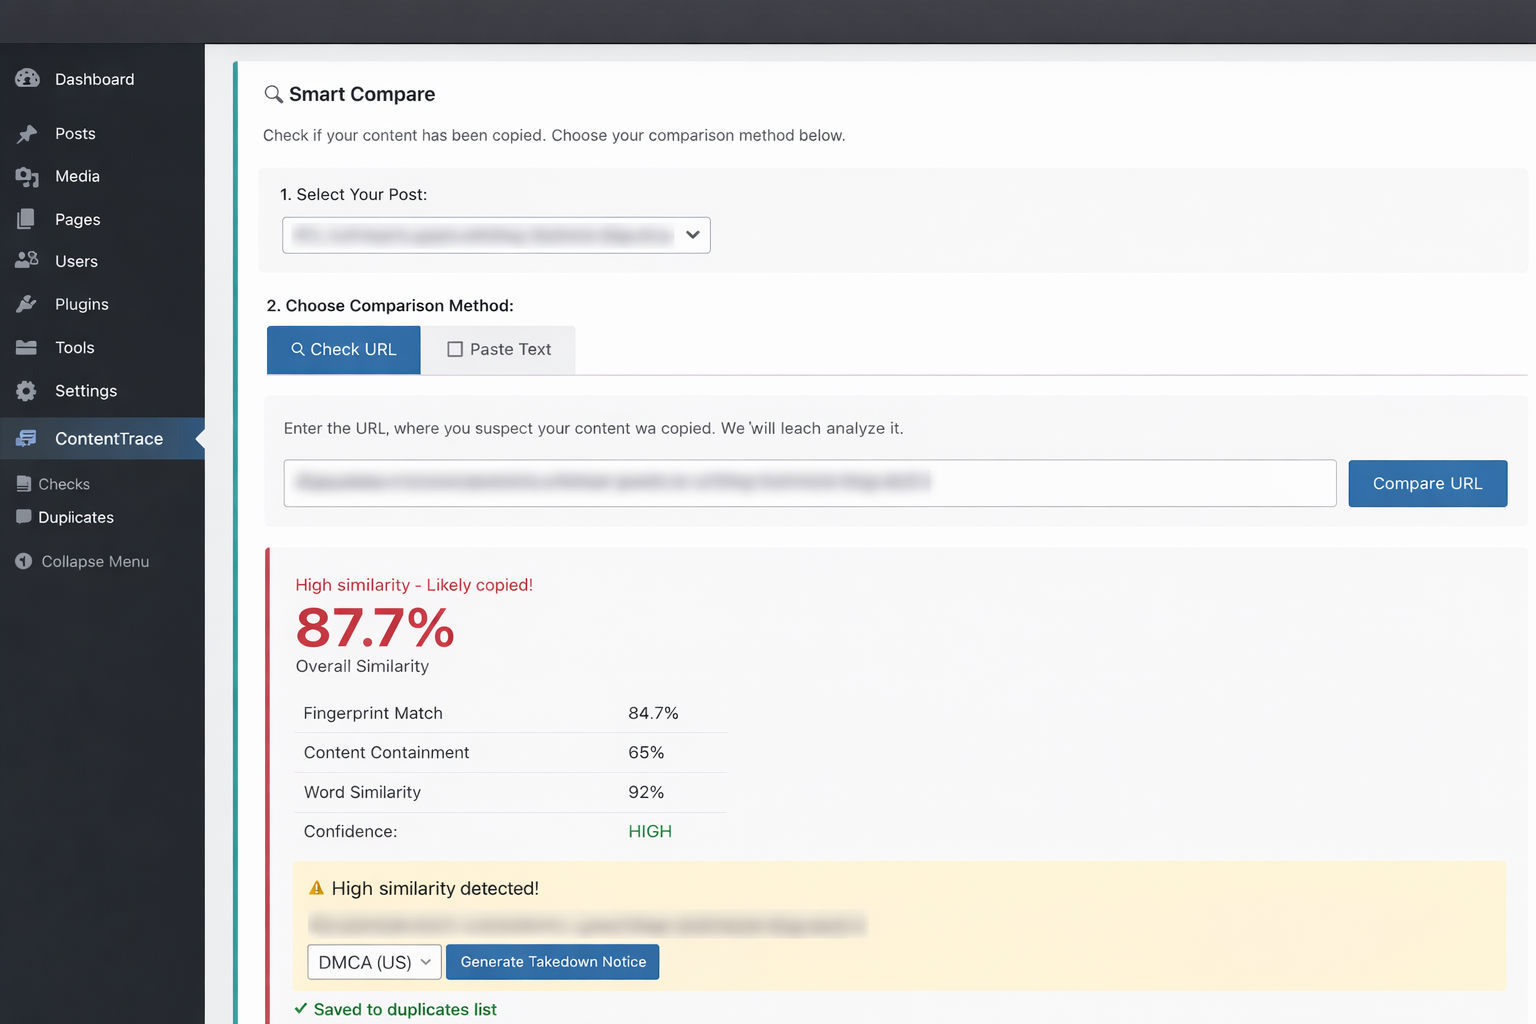
The automated scan finds potential matches, but sometimes you spot something yourself — a blog post that looks too similar, or a reader tips you off. That's where Smart Compare comes in. Scroll down on the Duplicates page to find it.
Two tools for two different situations:
- Compare URL — paste a link to the suspicious page. ContentTrace fetches it, extracts the text, and runs a full similarity analysis against your original post. Use this when the page is publicly accessible.
- Compare Text — paste the suspected text directly. This is useful when the content is behind a captcha, login wall, or firewall — or when you found it in a PDF, email newsletter, or social media post that has no direct URL.
Both give you a precise similarity score and highlight the matched phrases, so you have clear evidence before taking any action.
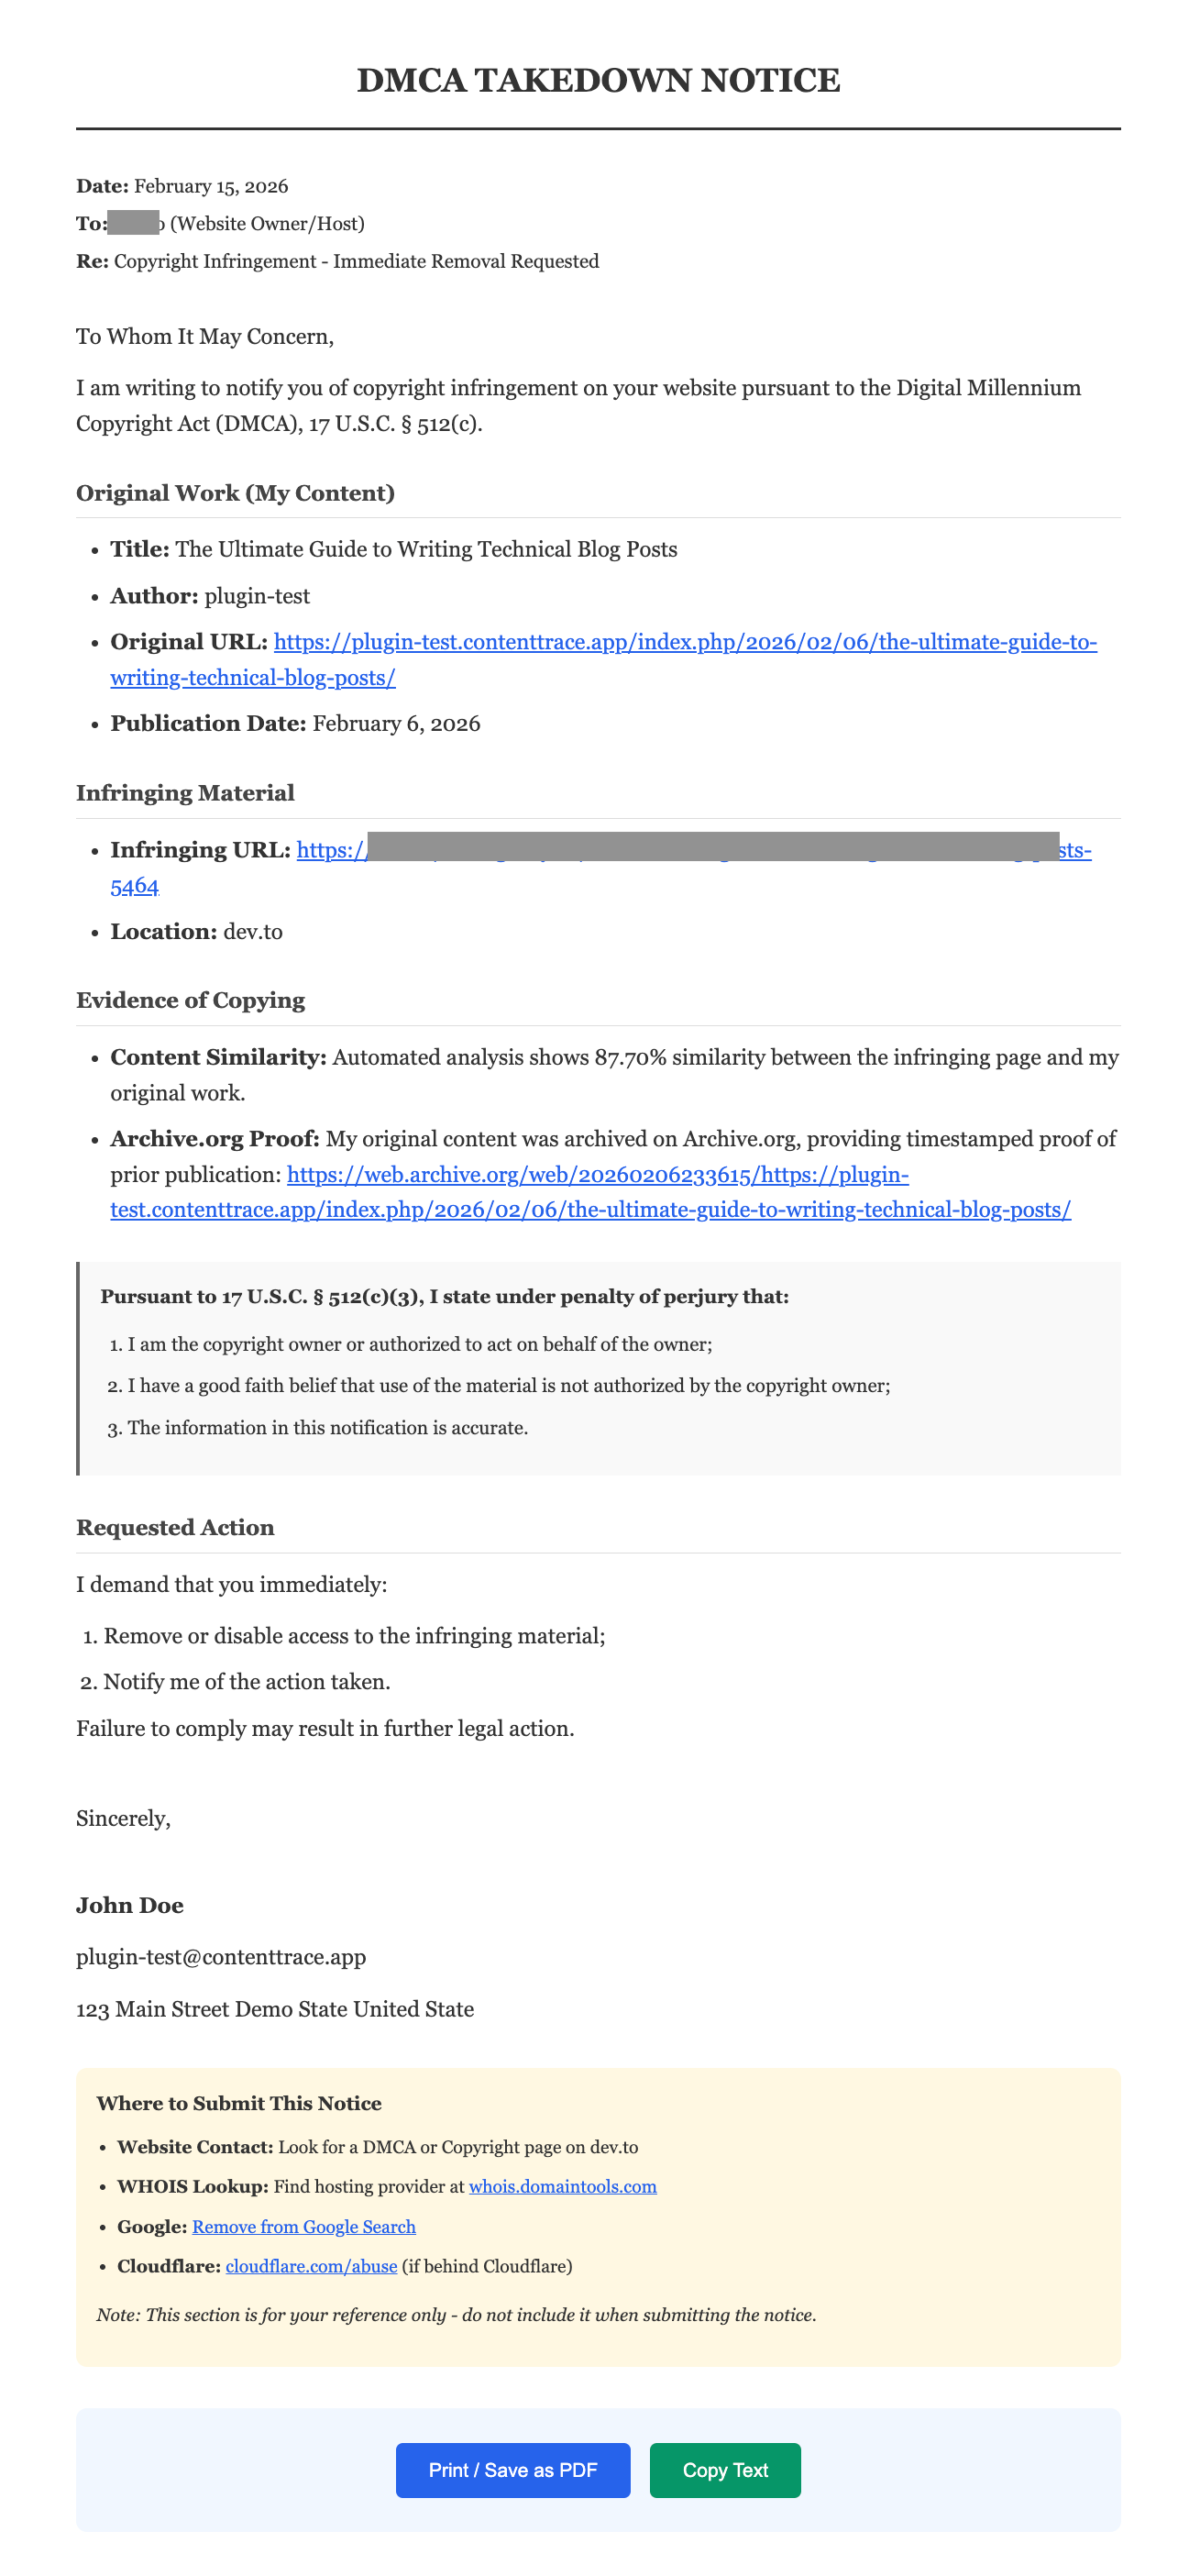
Send a Takedown Notice
If a match is confirmed, go to ContentTrace → Duplicates and scroll to the Takedown Notice Generator.
Choose your framework:
- DMCA — for US-hosted content (most common)
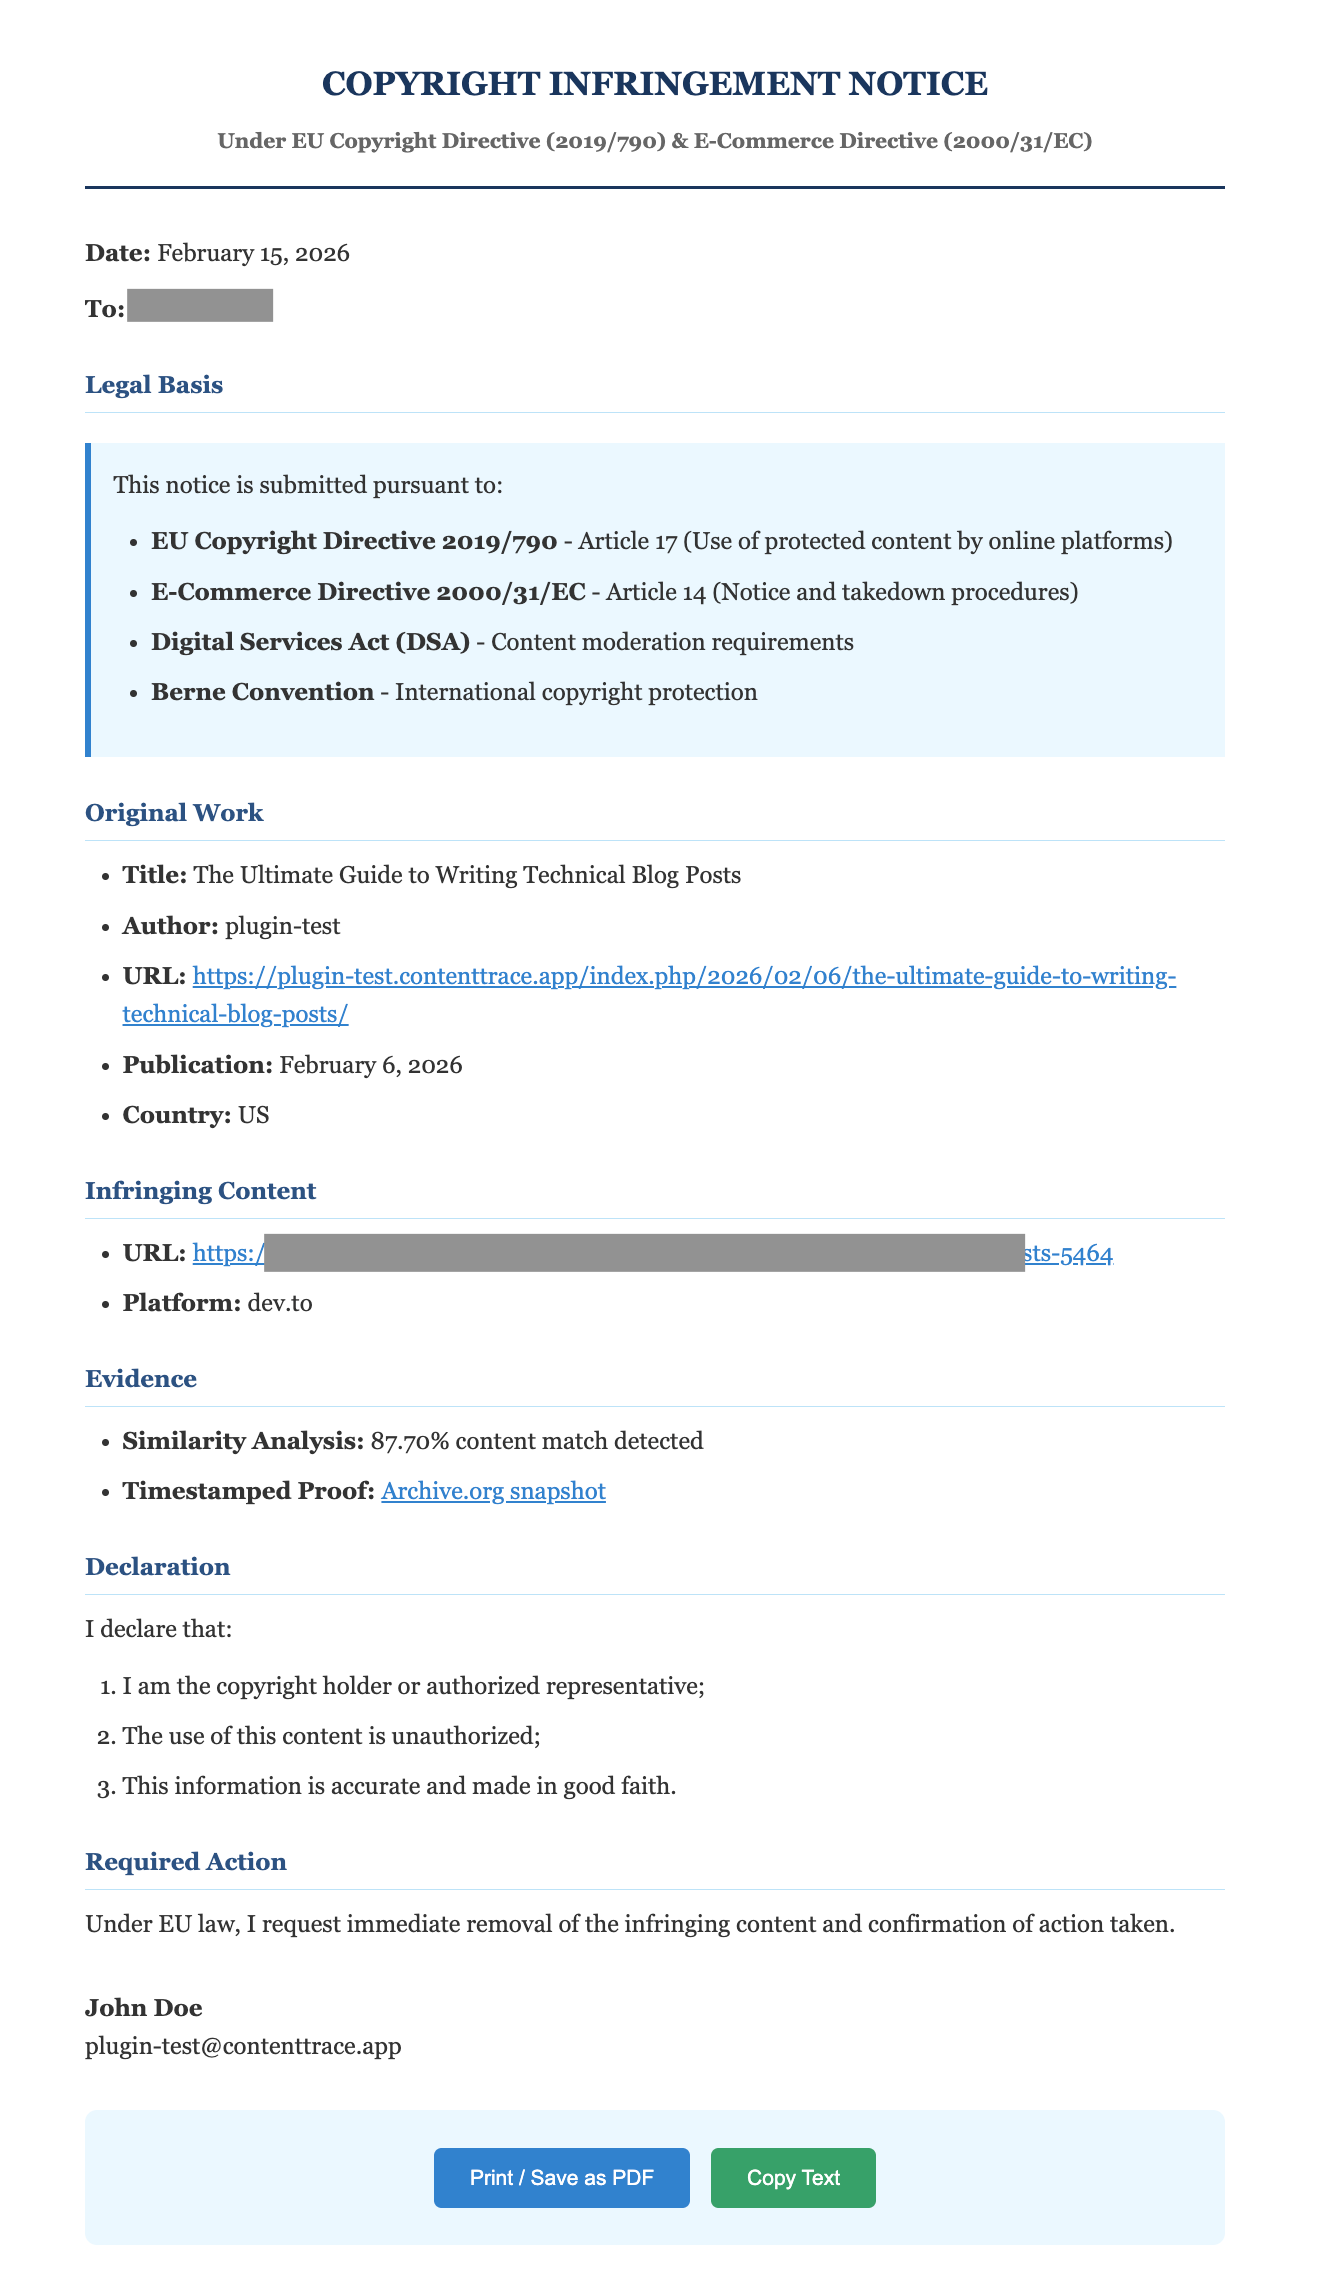
- EU Copyright Directive — for EU-hosted content
- International (Berne Convention) — for everything else
The notice includes your original URL, the infringing URL, your Archive.org timestamp proof, and the similarity score. Fill in your contact details and send it to the hosting provider.
Here's what the EU Copyright Directive notice looks like:
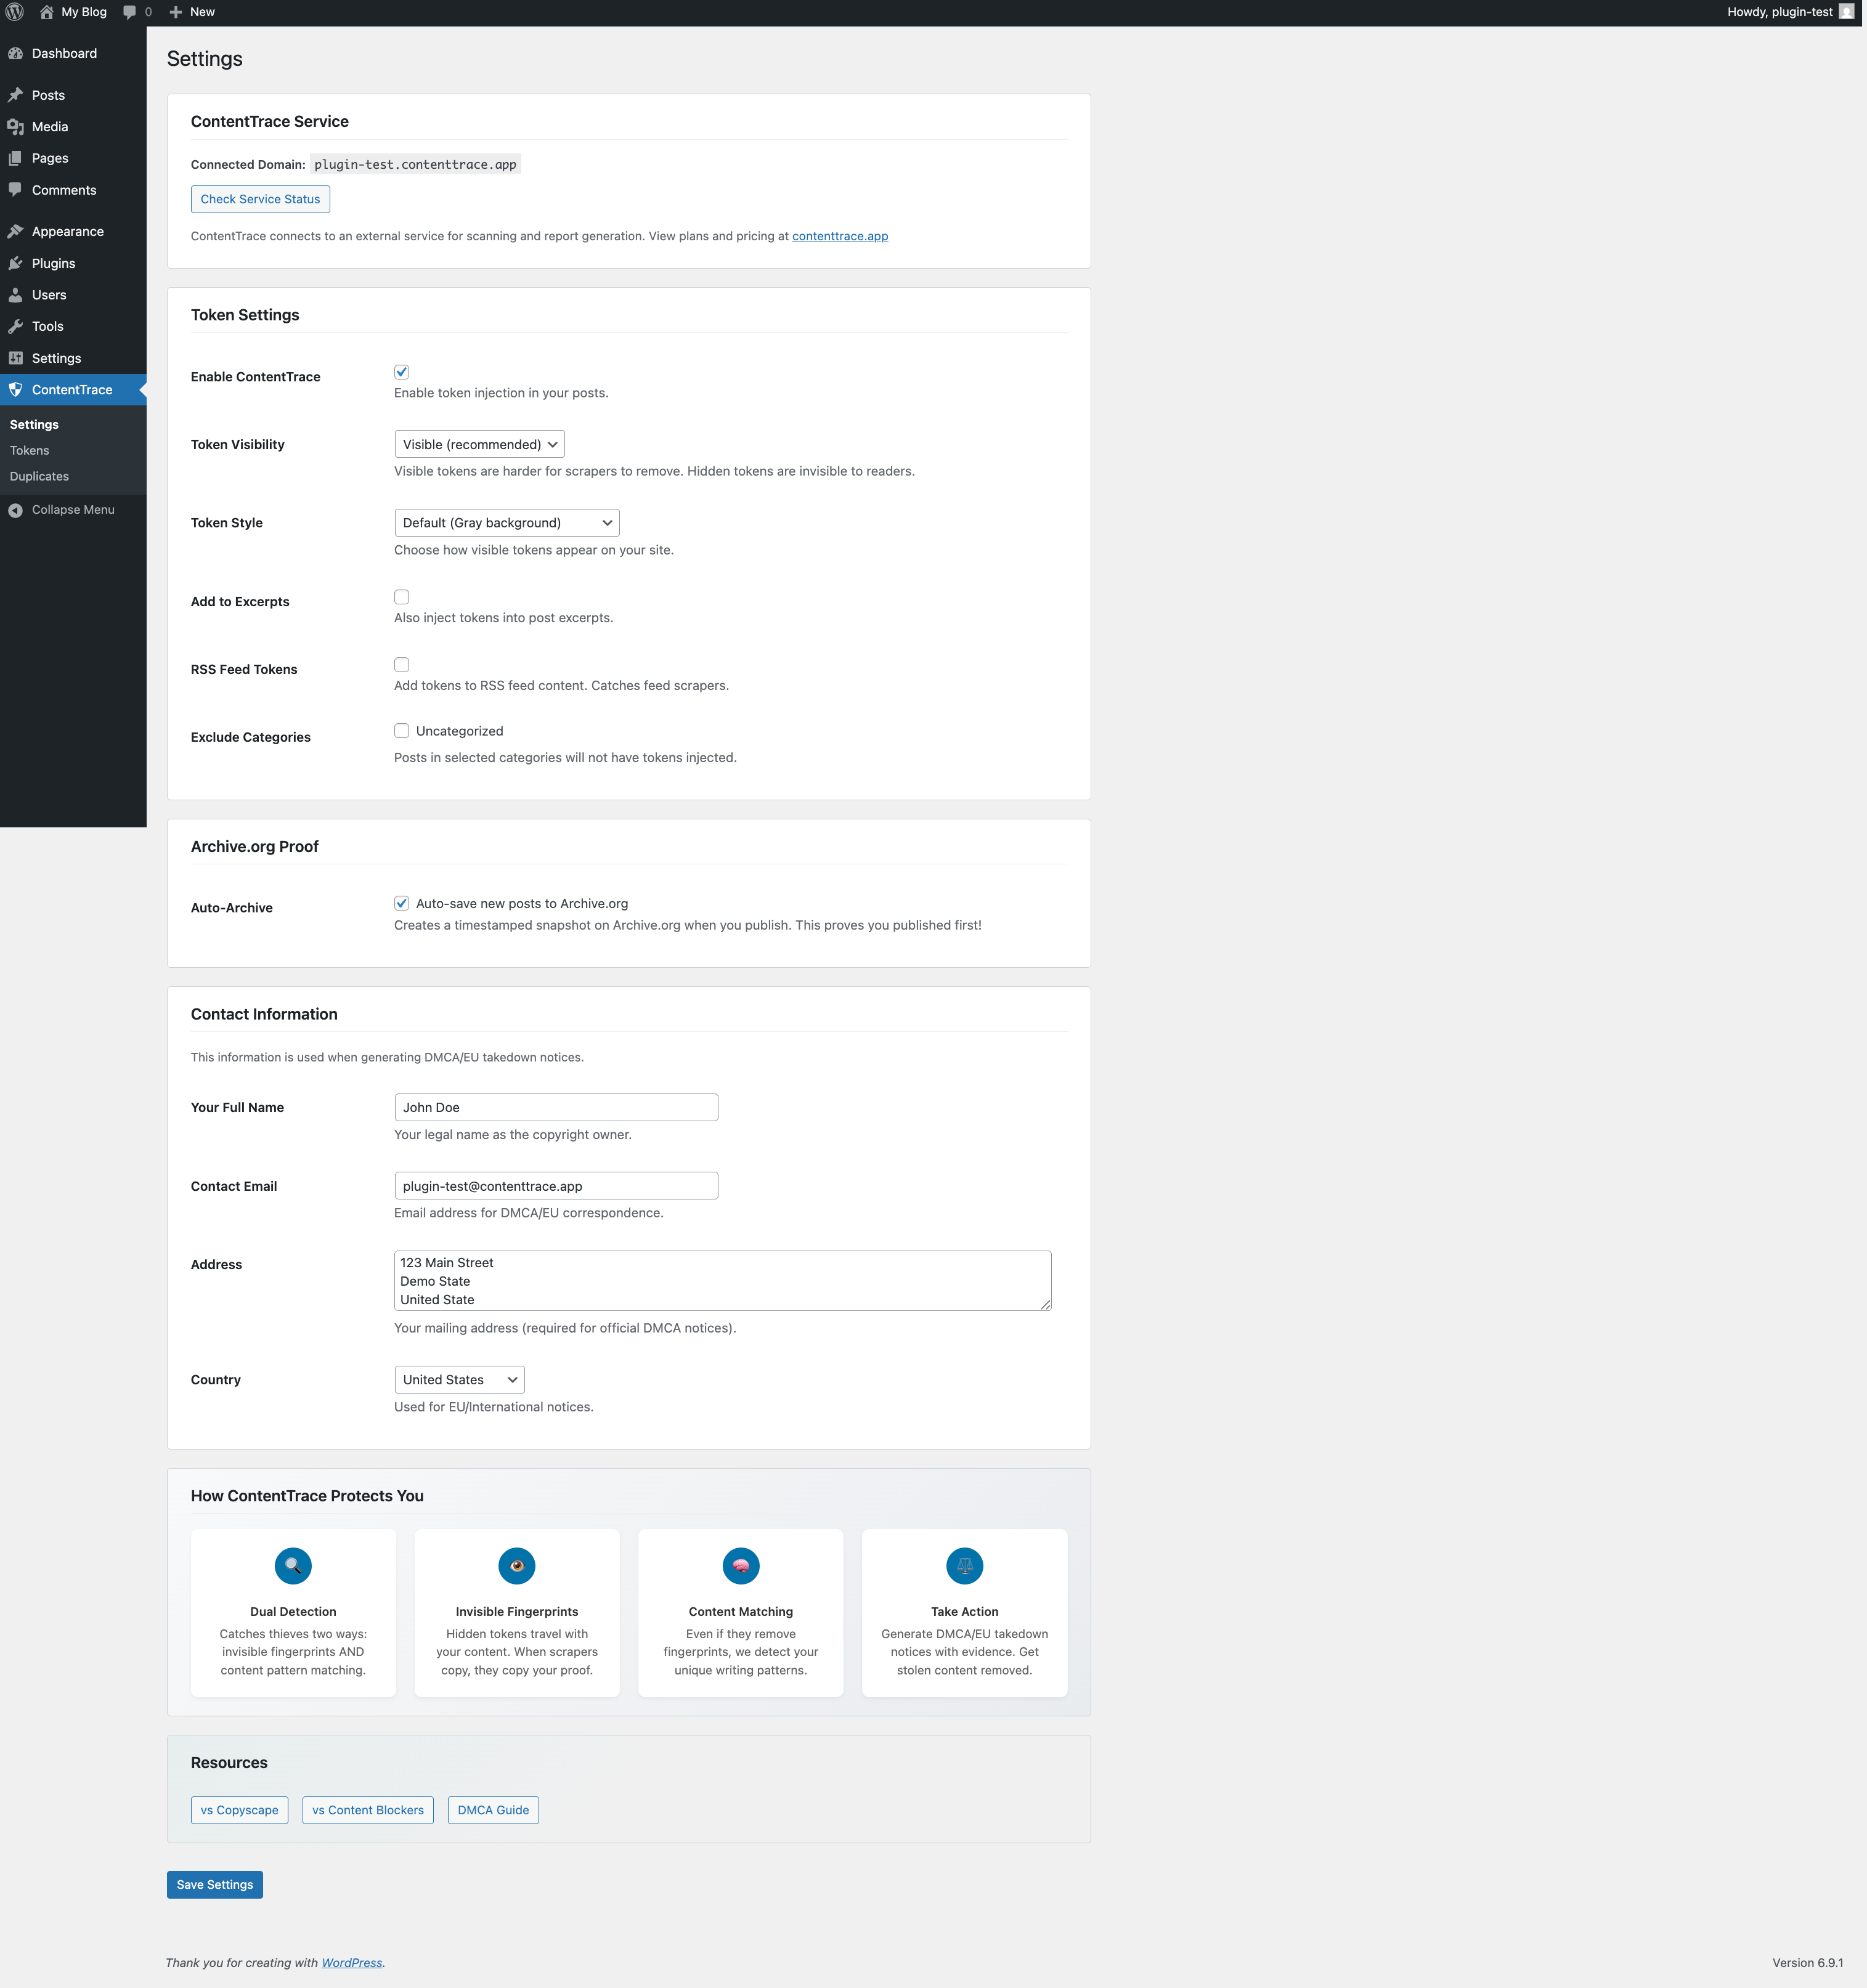
Configure Your Settings
Go to ContentTrace → Settings to customize your setup.
Here you can:
- Check your service connection status (should show green "Connected")
- See your current plan and usage limits
- Choose token visibility (visible for testing, hidden for production)
- Select token style presets
- Exclude categories from token injection
- Save your contact information for takedown notices
Ready to Protect Your Content?
Detect theft. Prove ownership. Send takedowns. All free, all from WordPress.
Install Free PluginNeed the full takedown process? Read the DMCA/EU Takedown Guide.